How To Create A Blog: Step By Step Guide.......
Blogging is quickly becoming one of the best and most popular outlets of communication. A blog allows you to share information, share ideas and spread knowledge to a large audience of people and you can customize your blog in any way you see fit in order to become noticed and gain popularity in the niche of your choosing.
Blogging allows you to become a better writer, a better person, and you can even make money in the process if you follow all the steps and dedicate your time and resources to your success.
I will walk you through the whole process in a moment, but first, let me tell you my story…
Four years ago, I didn’t know the slightest thing about blogging. I was a broke college student, looking for some extra income to pay off my student loans and textbooks (ok, maybe I wanted a little beer money too). Excited by the prospect of making money from my dorm room, I went ahead and registered my first domain name (I'll show you how I did that in a minute).
Then, I became confused. I didn’t know what to do next. I struggled for 18 days, invested time and energy to understand the new “blog,” checking Google for stuff like “how to create blog” without grasping anything.
Just follow the simple step-by-step guide below, and your blog could be ready in 20 minutes.
Starting a blog in 7 steps
Step 1: Know WHY you want to start a blog

People start blogs for different reasons. Today, blogging is a great way to:
- Become a better person. Blogging helps you think clearer, communicate with intentionality and build your creative flair.
- Improve your writing. Writing proficiency comes with regular practice and starting a blog helps you write regularly
- Make your voice heard. Gone are the days when only powerful politicians and wealthy people in business could air their views. Now, you, too, can!
- Make a difference. Do you want to help people take control of their personal finance? Start your own blog. You wish people would exercise more, make healthier meals and rest better? Start a blog.
- Get published. The world is changing, and traditional publishers are falling into irrelevance. Smart authors now make a blog, build a loyal audience and publish their works. This approach works always.
- Make money. It takes time and commitment, but people make real money from blogs. I’ve made tens of thousands of dollars myself from blogging. And many folks I have taught how to open a blog are doing fine too.
You can start a cool blog for any or all of the above purposes. Just use this simple guide, and you will see how easy it is.
Step 2: Decide WHAT your blog will focus on

Travel blogs. Vegetarian blogs. Romance blogs. Writing blogs. Marketing blogs. Political blogs. Religion blogs. Fashion blogs. Photography blogs.
So… what type of blog should you start?
What will be the focus or theme of your blog? This theme is called a niche –– and you should have one.
The best is to choose a niche you are passionate about. Blogging is to be enjoyed. You know, there’s fulfillment in connecting with others and providing helpful information. You’ll experience this joy, and be able to do it for long if you are passionate about what you blog about.
When I finally launched my first blog, I found I was really passionate about writing and publishing. So, I made that my niche and was able to connect with, learn from and impact many nice people. I even made money from it. I was fulfilled.
A niche is important for several reasons and can also lead to increased profitability for your blogging platform. Consider the resources you have, how easy it will be to attract advertisers for this niche, and what is the competition in this niche category? However, if profitability is not your key focus, then consider your strengths and factor them into your blogging content. If you have expertise in a specific niche, it will definitely work to your advantage when starting your first blogging site.
There are also advantages to choosing a niche if you want to begin blogging for a small business. If you are starting a small business, then you will want to focus your attention on your strengths and gain market appeal for your products.
Choosing a niche for your small business will also allow you to reach potential customers because you will be able to accurately describe the products and services you are offering while finding new ways to step away from your competition. Yes, you can be as successful as the next business doing the same thing as you, but the key to greater success is focusing your business on appealing to the right people while allowing yourself the opportunity to reach new potential customers along the way.
Most of the time, people that are shopping online already know what it is they are looking to buy. Having a niche allows you to describe better what you are offering and it makes it easier for the average internet user to find your particular website because they are actively searching, not just browsing.
Scalability is another factor that most small business owners will likely consider as they set up their blog and website and choose their host company. Choose a web host company that can grow with your business. It can be detrimental if you dedicate all your time and resources on a web host company or blogging platform that you quickly grow out of; a lot of hosting companies will not allow you to transfer your site and content to another which means you could ultimately have to start all over as your business grows.
What are your hobbies?
What do you feel happy doing? What are you always excited to talk about to your friends?
Is it fashion, technology, entrepreneurship, leadership, food, traveling, relationship, movies or fiction? That is probably what you should be blogging about. If you are passionate about it, you can keep sharing useful information about it.
Create a WordPress blog today, and talk about what you love, what you know, and what you’re learning. It’s easy, and you CAN do it.
Step 3: Decide WHICH of the blogging platforms you’ll use
- Blogger: e.g. yourfashionguy.blogspot.com
- Hosted WordPress: e.g. yourfashionguy.wordpress.com
- Self-Hosted WordPress: e.g. yourfashionguy.com
WordPress is by far the most popular and fastest growing blogging platform according to a recent web technology survey. Millions of people use it, including me. That's because WordPress makes it easy to create your blog.
WordPress is easy to use, even for a beginner, and you do not have to have previous technical knowledge to use their dashboard. You can create your content and even paste text from a Microsoft Word or Google Doc to add to your chosen layout.
WordPress.com vs WordPress.org (Self-Hosted)
There are two types of WordPress blogs. Don't pick the wrong one! Here's the difference between WordPress.com and WordPress.org.If your interest is to start a WordPress blog to make money, advance your career, or gain followers a self-hosted WordPress.org blog is more professional. It's called self-hosted because you own the blog and the domain name.
WordPress.com offers users free hosting services and a free domain name (that ends in . It's easy for beginners as well. So what's the catch? You do not own the blog.
With WordPress.com you will experience limited control. WordPress.com chooses the ads they will place on your site so that they can make their revenue on your free blog site. So you will not be able to add any ads or easily make money from your blog with that version. If you are a non-profit the ads will be annoying for your audience.
You are limited to the amount of storage you can utilize and if you want to have a better domain for your WordPress blog, then you will have to pay for the upgraded service to receive these better features.
You are also limited with the design. While you have the option of customization, you will still have to adhere to the free list of themes that the WordPress provides for you. However, you can purchase a theme upgrade for approximately $30 per year.
The other disadvantages one can expect from using a free blogging platform are outlined below in more detail:
The free blogging platforms aren’t really free.
Free blogging platforms (like Tumblr, Medium, Blogger, or WordPress.com) come with TONS of annoying limitations that just enslave you. Here’s 5 of them:Limit #1
Limit #2
Limit #3
Limit #4
Limit #5
A big advantage to choosing a self-hosted WordPress blog is the control you can maintain over the software that is used. A lot of companies choose to limit or exclude plugins or widgets. Keep this in mind when you are making your decision about the hosting company you choose or whether it will be more beneficial to you to self-host your blog.
Self-hosting also allows you to change hosting companies later if you decide you need to move to something with more features and upgrades. You will have the option to upgrade to a dedicated server or a virtual private server in the future with ease.
If you are considering a self-hosted WordPress blog, then you will have to find a hosting company. There are several hosting companies available in this industry including HostGator and BlueHost just to name a couple. Initially, you will sign up to receive their hosting services, and then you can install WordPress on their servers with 1 click.
How much does a self-hosted blog cost?
Turns out, not much.
What you will pay to set up your blog is less than a movie ticket. First, you’ll need a blog domain name – usually sold for $15 but I’ll tell you how to grab it for FREE.
Second, you’ll need a hosting account which costs less than $72 for the first year.
I’ll show you how easy both steps are in a moment.
Step 4: Decide which web host to use

- The host company servers often had issues and make my sites load slowly and go down too often (this gave me nightmares in day time)
- Their customer care and technical support agents were often too lazy, clueless or too busy with other things to properly offer help when I needed it
- Some web hosting companies also do some aggressive, spammy marketing like installing plugins or placing their links on my websites without my consent
A small shared hosting account is a good choice for beginners because it is more affordable, easier to maintain, and may be sufficient enough to start your first blogging site. Upgrades to a virtual private server or dedicated server can come later as your site and site traffic grows.
Server reliability is essential because you do not want to risk your site going down for extended periods of time. If your site goes down, it can result in lost revenue. Uptime guarantees are also important, and a web host provider that operates on a powerful server with a stable connection should be able to guarantee their users at least a 99% uptime guarantee.
BlueHost Web Hosting for your Blog
BlueHost is one hosting company that is even recommended by WordPress for anyone that is considering starting a WordPress blog, or even any other blog. BlueHost offers limited hosting space and bandwidth and they also provide free email, a free domain name, and even free advertising offers. BlueHost is optimized for WordPress and continues to meet WordPress Standards.BlueHost also offers special discounts and promotions for their web hosting services and offers support and resources. They are a bigger web hosting company, therefore, they have more resources than a smaller web hosting company would have. They are focused on their customers more than they are focused on increasing their own revenue.
BlueHost provides affordable pricing and is especially affordable for beginners. They provide their new customers with onboarding services that will help educate the user on how to properly set up their website from the very beginning. Onboarding allows the user to see if the services the web host service is providing are manageable and meeting their expectations.
With BlueHost you will have access to a wealth of knowledge and information from the experts and they offer great technical support in case you run into any problems while building your new blogging website.
However, BlueHost is not the only option when it comes to web host providers. HostGator is another large company that focuses their attention on the affordability and ease of use required for the beginner to the more technical aspects that a novice would be looking to receive.
Today, the reliable web host I recommend is HostGator.
Why HostGator is reliable
#1: they provide 24/7 customer support through chat, phone, or email and in my experience, their customer service reps are helpful, polite and professional.#2: they guarantee and provide an incredible server uptime of 99.9%. Very few web hosts can match that feat.
#3: they give you SSL – if you don’t have SSL (https://) for your site then you could be losing traffic from Google.
#4: their service is extremely easy to use, and they have an option that is specifically tailored to WordPress. Whether you’re an expert or a non-geek, they’ll make your experience memorable.
#5: they offer unlimited email accounts and websites.
#6: they are giving howtostartablogonline.net readers a 30% discount by using the coupon code htsabo.
Disclosure: I am an affiliate of HostGator, and if you sign up through any of the links on this page, I may get a little commission (at no extra cost to you). But this didn’t influence my recommendation because all hosting services have similar programs. I recommend HostGator because I have personal experiences with them and honestly believe they offer amazing quality.
#7: they have a 45 Day Money Back Guarantee.
Step 5: Register Your Domain Name
Search for you Domain Name
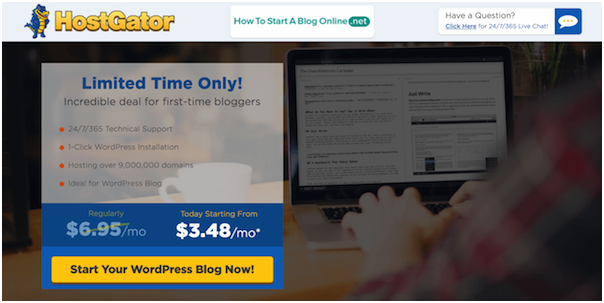
First, click here to go to www.HostGator.com and then click “Start Your WordPress Blog Now” for hosting.

Next, you will create a login and security pin. Be sure to take a minute and note these items somewhere so you can access them later.
The 3rd step on this page is to enter your billing information.
4th is the recommended add-ons. I recommend you get the HackAlert monitoring but the other two items are not as valuable.
Review your details and at the bottom of the page and be sure to check the box indicating you agree to the terms (after you have read them of course)
Next, be sure you need to enter the code htsabo in the ‘Enter a Coupon Code’ section for 50% OFF! And click the “Validate” button.

The next page shows that your order is successful.
Congratulations! That’s all it takes to create a web hosting account with the HostGator web hosting provider.
Step 6: Setting Up Your WordPress Blog Site on HostGator
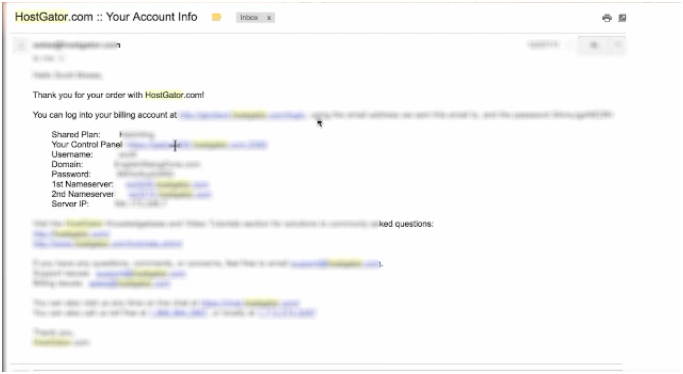
To set up your WordPress blog site, you will need to login to your Cpanel. Just head over to your welcome email from HostGator and find the Cpanel login details and besides the text “Your Control Panel” you will see the URL to login:
 Go to the URL indicated and login. Next click “Get Started with WordPress” under the Special Offers section.
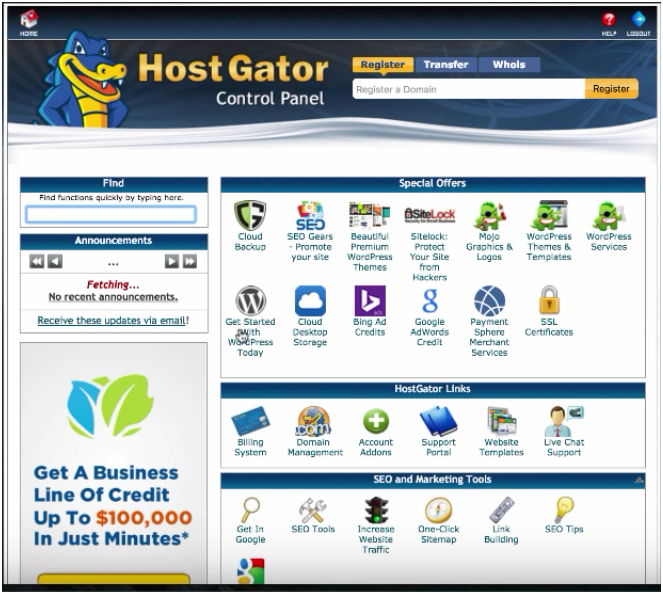 Next, click the “Install” button. And follow the prompts to install WordPress on your new domain. Be sure to use your real email address so you can get your WordPress username and password.
That is all the settings you need to change, finally, click Install at the bottom. The installer will take a few minutes, and finally, you will see the success screen.
Now your WordPress blog site is up and running. Great Job!
To set up your WordPress blog site, you will need to login to your Cpanel. Just head over to your welcome email from HostGator and find the Cpanel login details and besides the text “Your Control Panel” you will see the URL to login:
That is all the settings you need to change, finally, click Install at the bottom. The installer will take a few minutes, and finally, you will see the success screen.
Now your WordPress blog site is up and running. Great Job!
Step 7: Login to your new blog and start blogging
Open a new browser tab
and go to “http://YourNewBlog.com/wp-admin” (replace “YourNewBlog.com”
with your blog domain name). Login with the username and password you
copied in step 5 above.
 You
will see your blog dashboard; this is the “back side” of your website
from where you set everything that your readers see on the “front side”.
You
will see your blog dashboard; this is the “back side” of your website
from where you set everything that your readers see on the “front side”.
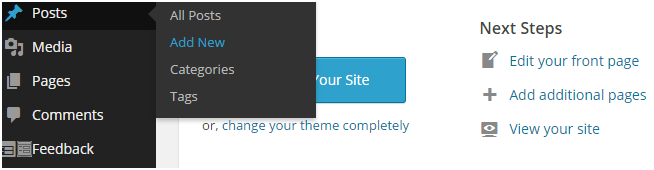
Look to the left of your dashboard, and you will see menus.
If you want to publish a new post on your blog right away, that is entirely fine. The post doesn’t have to be perfect; it just has to be published, to get you started. So, go ahead and do it.
Hover the mouse on “Posts” and click “Add New” from the sub-menus that pop out.
 Add the title of your post in the first tab and the content in the second tab.
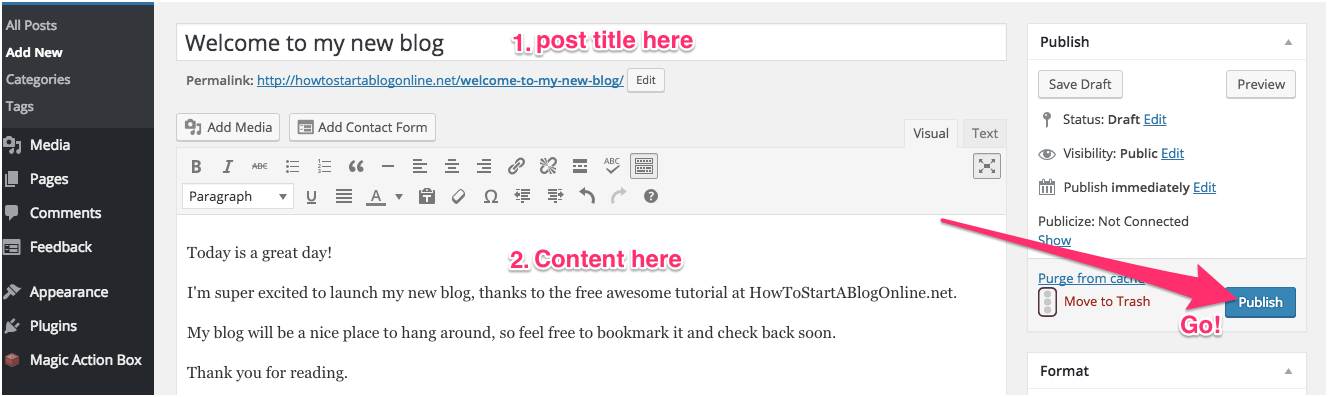 Hit “Publish”.
When the next page loads, click “View post” to see how your new post appears to your readers.
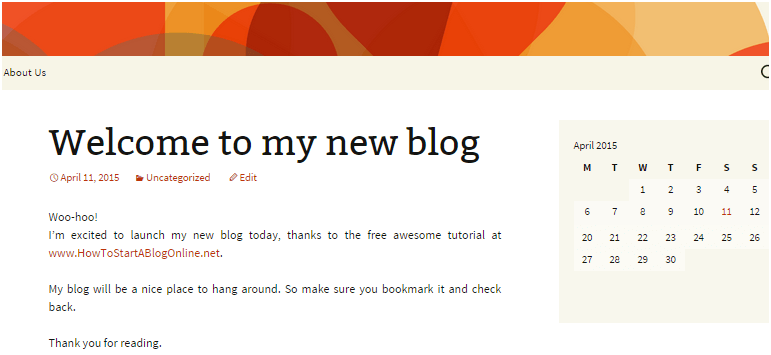 Woo-hoo! That’s all there is to creating a blog. 20 minutes is all you need.
Look to the left of your dashboard, and you will see menus.
If you want to publish a new post on your blog right away, that is entirely fine. The post doesn’t have to be perfect; it just has to be published, to get you started. So, go ahead and do it.
Hover the mouse on “Posts” and click “Add New” from the sub-menus that pop out.
When the next page loads, click “View post” to see how your new post appears to your readers.


Comments
Post a Comment